
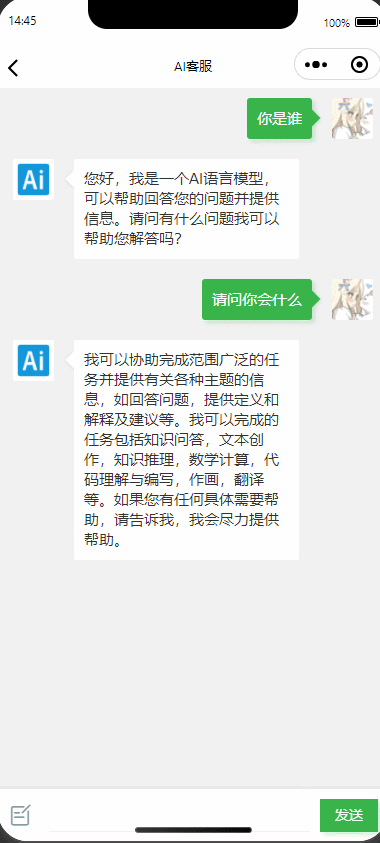
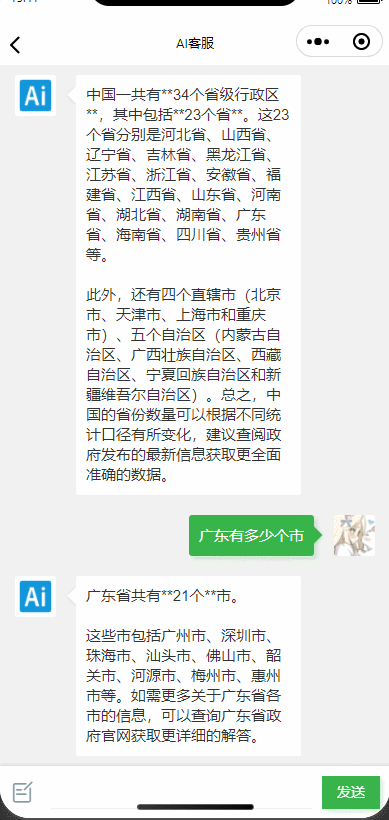
一、文章前言
此文主要实现基于Springboot+微信小程序调用文心一言大模型实现AI聊天对话功能,使用Java作为后端语言进行支持,界面友好,开发简单。

二、开发流程及工具准备
2.1、登录百度智能云平台,获取 API Key 和 Secret Key两个凭证
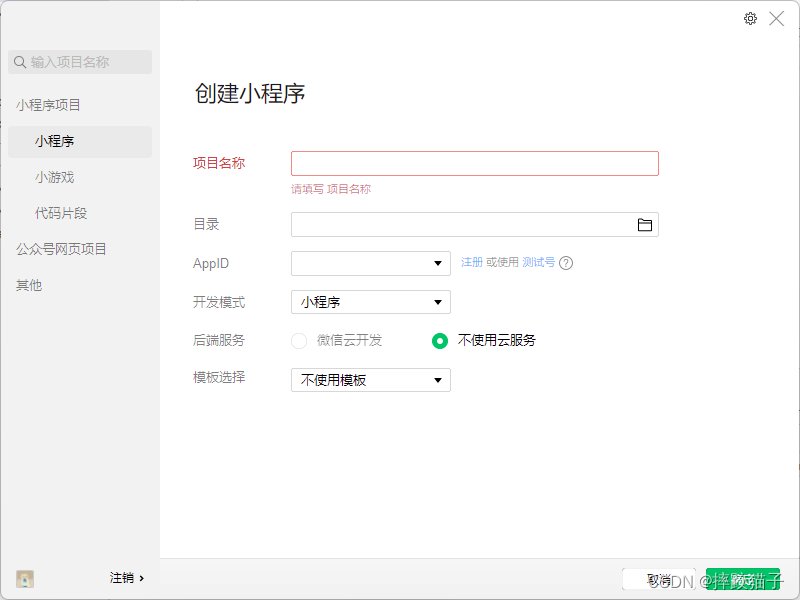
2.2、注册微信公众平台账号。
2.3、下载安装IntelliJ IDEA(后端语言开发工具),Mysql数据库,微信Web开发者工具。
三、开发步骤
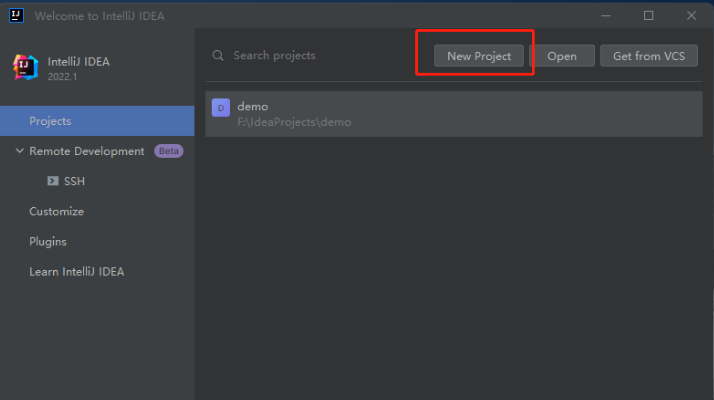
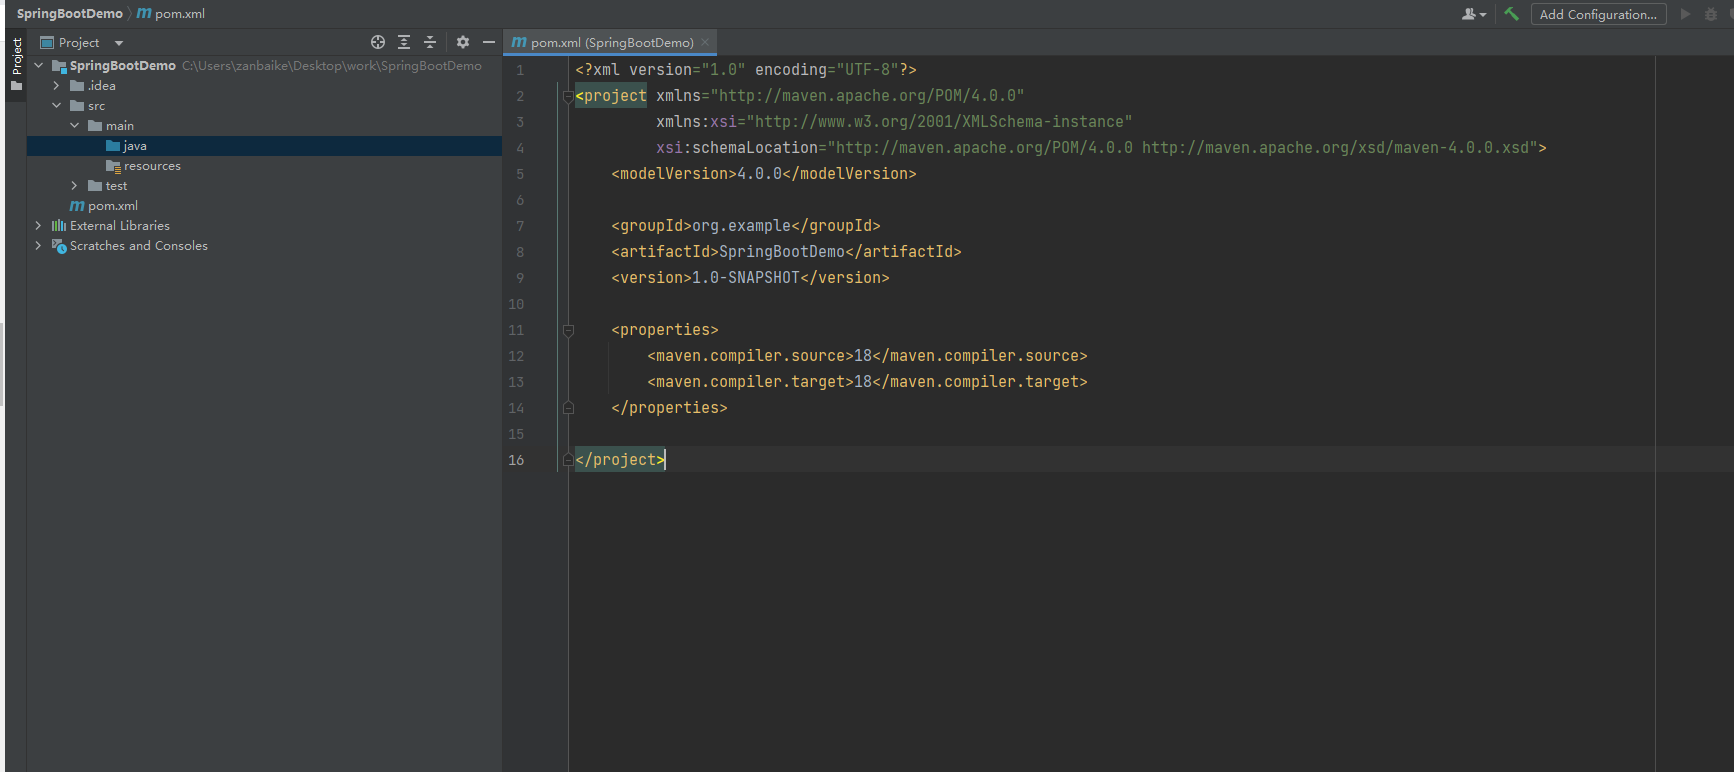
1.创建maven project
先创建一个名为SpringBootDemo的项目,选择【New Project】
然后在弹出的下图窗口中,选择左侧菜单的【New Project】(注:和2022之前的idea版本不同,这里左侧没有【Maven】选项,不要选【Maven Archetype】!!!),输入Name(项目名):SpringBootDemo,language选择【java】,build system选择【maven】,然后选择jdk,我这里选的是jdk18.
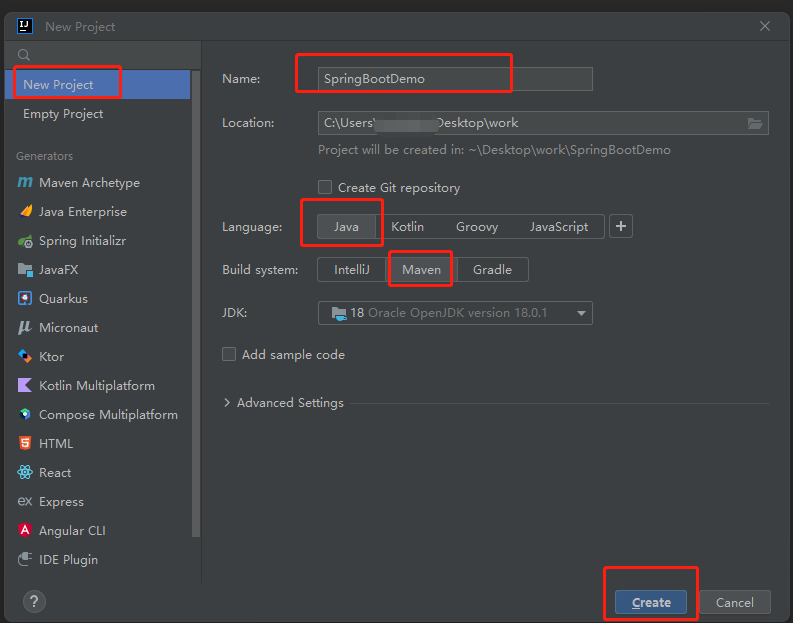 然后点击【Create】
2.在project下创建module
点击右键选择【new】—【Module…】
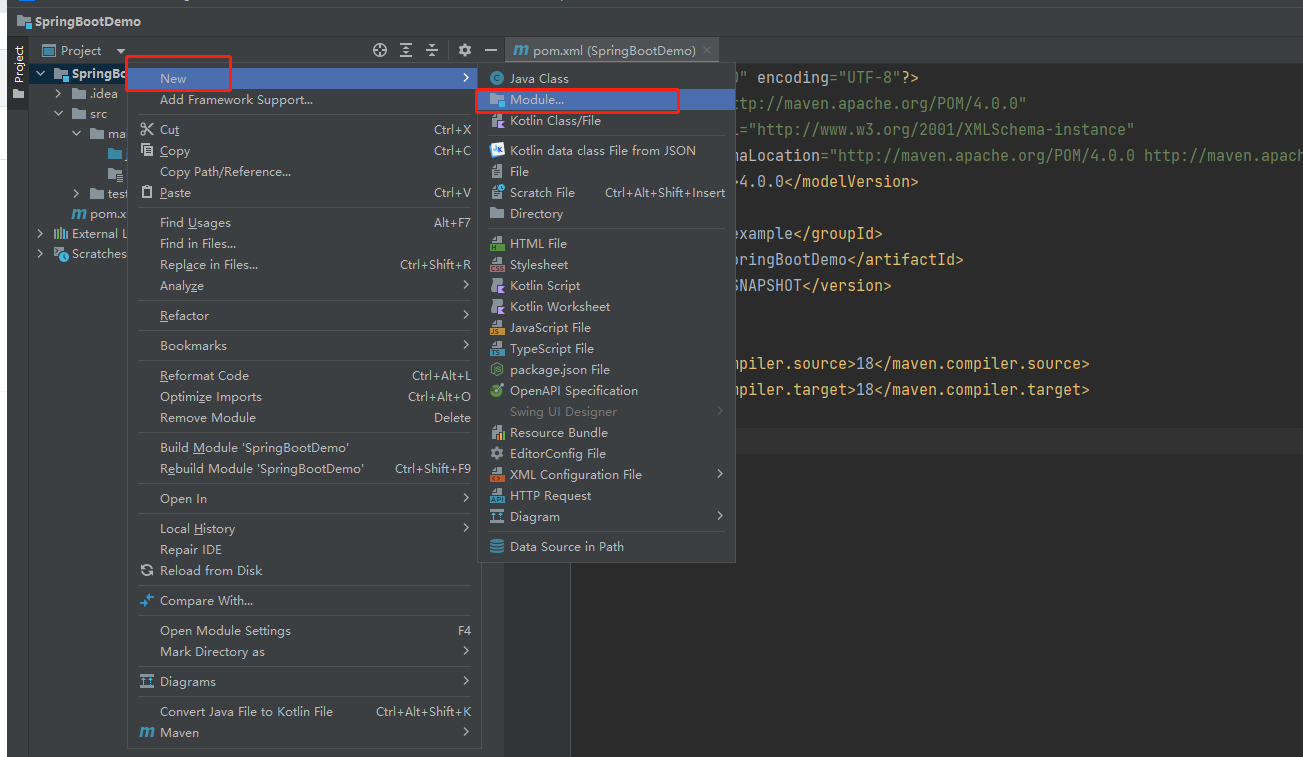
左侧选择【Spring initializr】,通过idea中集成的Spring initializr工具进行spring boot项目的快速创建。窗口右侧:name可根据自己喜好设置,group和artifact和上面一样的规则,其他选项保持默认值即可,【next】

Developer Tools模块勾选【Spring Boot DevTools】,web模块勾选【Spring Web】

此时,一个Springboot项目已经搭建完成,可开发后续功能
3.编写一个消息实体类、Mapper、service(三层架构)
@Data
public class Chat {

    @TableId(type = IdType.AUTO)
    private Long id;

    private Long userId;

    private Long targetUserId;

    private LocalDateTime createTime;

    private String userName;

    private String targetUserName;

    private String content;

}

- 1
- 2
- 3
- 4
- 5
- 6
- 7
- 8
- 9
- 10
- 11
- 12
- 13
- 14
- 15
- 16
- 17
- 18
- 19
由于我们使用mybatis-plus,所以简单的增删改查不用自己写,框架自带了,只需要实现或者继承他的Mapper、Service


4.编写调用ai服务类
//获取AccessKey
public static String GetAccessToken()
{
    String url = "https://aip.baidubce.com/oauth/2.0/token";
    String params="grant_type=client_credentials&client_id=xxxx&client_secret=xxxxx";
    // 发送 POST 请求
    String response = HttpUtil.post(url, params);
    JSONObject json=JSONObject.parseObject(response);
    return json.getString("access_token");
}
- 1
- 2
- 3
- 4
- 5
- 6
- 7
- 8
- 9
- 10
- 11
- 12
- 13
- 14
5.创建控制器Controller
先创建Controller Package
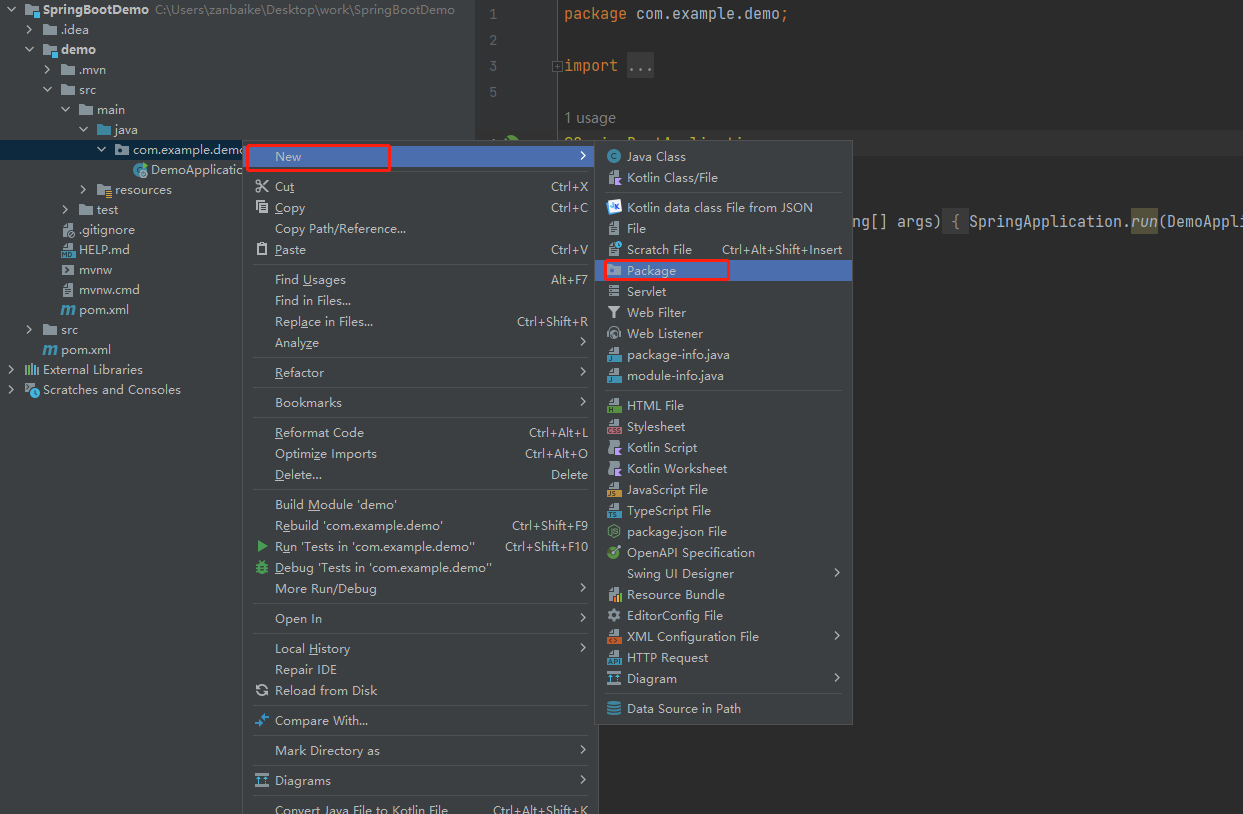
创建一个Controller
输入类名,选在【Class】
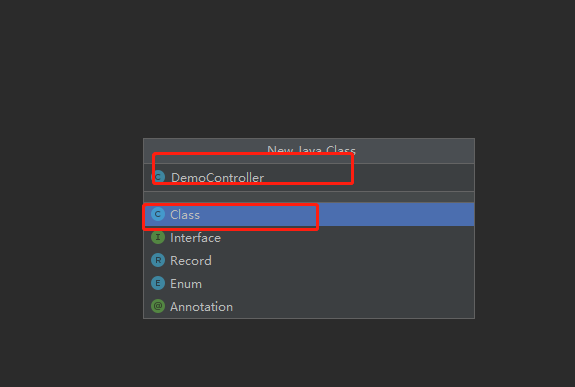
因为要编写Rest风格的Api,要在Controller上标注@RestController注解
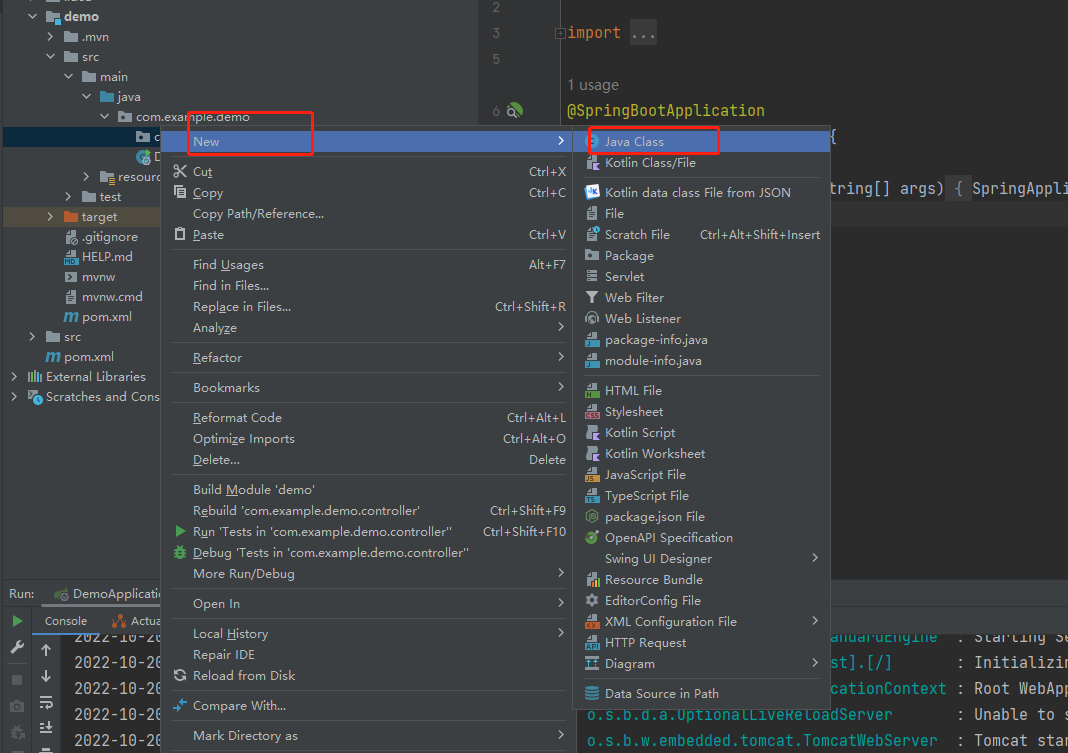
6.创建具体的Api接口
@RestController
public class DemoController {


    @RequestMapping("chat-gpt")
    public Map chat(String sender){
    String token= GetAccessToken();
    List<MessageDTO> messageDTOS=new ArrayList<>();
    messageDTOS.add(new MessageDTO("user",sender));
    Map<String, Object> map=new HashMap<>();
    map.put("user_id","");
    map.put("messages",messageDTOS);
    map.put("temperature",0.95);
    map.put("top_p",0.8);
    map.put("penalty_score",1);
    map.put("disable_search",false);
    map.put("enable_citation",false);
    map.put("stream",false);
    String url = "https://aip.baidubce.com/rpc/2.0/ai_custom/v1/wenxinworkshop/chat/ernie-speed-128k?access_token="+token;

    String response = HttpUtil.createPost(url)
            .header("Content-Type", "application/json")
            .body(JSONObject.toJSONString(map))
            .execute()
            .body();

    ReturnMap returnMap = new ReturnMap();
    returnMap.setData(JSONObject.parse(response));
    return returnMap.getreturnMap();

}


}
- 1
- 2
- 3
- 4
- 5
- 6
- 7
- 8
- 9
- 10
- 11
- 12
- 13
- 14
- 15
- 16
- 17
- 18
- 19
- 20
- 21
- 22
- 23
- 24
- 25
- 26
- 27
- 28
- 29
- 30
- 31
- 32
- 33
- 34
- 35
- 36
- 37
- 38
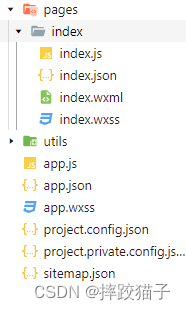
7.小程序代码
3.20、在pages文件夹下面创建一个文件夹并新建对应的page文件,并实现聊天对话框样式。
<view class="cu-chat" id="j_page">
  <view class="cu-item 'self'" wx:for="{{chatData}}">
    <view class="main">
      <view class="content shadow bg-green">
        <text>{{item.content}}</text>
      </view>
    </view>
    <view class="cu-avatar radius" style="background-image:url(../../../images/cat.jpg)"></view>
    <view class="date">{{item.createTime}}</view>
  </view>
</view>

<view class="cu-bar foot input {{InputBottom!=0?'cur':''}}" style="bottom:{{InputBottom}}px">
  <view class="action">
    <text class="cuIcon-sound text-grey"></text>
  </view>
  <input class="solid-bottom" value="{{content}}" bindinput="formMsg"  bindfocus="InputFocus" bindblur="InputBlur" adjust-position="{{false}}" focus="{{false}}" maxlength="300" cursor-spacing="10"></input>
  <view class="action">
    <text class="cuIcon-emojifill text-grey"></text>
  </view>
  <button class="cu-btn bg-green shadow" bindtap="sendMsg">发送</button>
</view>
- 1
- 2
- 3
- 4
- 5
- 6
- 7
- 8
- 9
- 10
- 11
- 12
- 13
- 14
- 15
- 16
- 17
- 18
- 19
- 20
- 21
- 22
.cu-chat {
	display: flex;
	flex-direction: column;
}

.cu-chat .cu-item {
	display: flex;
	padding: 30rpx 30rpx 70rpx;
	position: relative;
}

.cu-chat .cu-item>.cu-avatar {
	width: 80rpx;
	height: 80rpx;
}

.cu-chat .cu-item>.main {
	max-width: calc(100% - 260rpx);
	margin: 0 40rpx;
	display: flex;
	align-items: center;
}

.cu-chat .cu-item>image {
	height: 320rpx;
}

.cu-chat .cu-item>.main .content {
	padding: 20rpx;
	border-radius: 6rpx;
	display: inline-flex;
	max-width: 100%;
	align-items: center;
	font-size: 30rpx;
	position: relative;
	min-height: 80rpx;
	line-height: 40rpx;
	text-align: left;
}

.cu-chat .cu-item>.main .content:not([class*="bg-"]) {
	background-color: var(--white);
	color: var(--black);
}

.cu-chat .cu-item .date {
	position: absolute;
	font-size: 24rpx;
	color: var(--grey);
	width: calc(100% - 320rpx);
	bottom: 20rpx;
	left: 160rpx;
}

.cu-chat .cu-item .action {
	padding: 0 30rpx;
	display: flex;
	align-items: center;
}

.cu-chat .cu-item>.main .content::after {
	content: "";
	top: 27rpx;
	transform: rotate(45deg);
	position: absolute;
	z-index: 100;
	display: inline-block;
	overflow: hidden;
	width: 24rpx;
	height: 24rpx;
	left: -12rpx;
	right: initial;
	background-color: inherit;
}

.cu-chat .cu-item.self>.main .content::after {
	left: auto;
	right: -12rpx;
}
- 1
- 2
- 3
- 4
- 5
- 6
- 7
- 8
- 9
- 10
- 11
- 12
- 13
- 14
- 15
- 16
- 17
- 18
- 19
- 20
- 21
- 22
- 23
- 24
- 25
- 26
- 27
- 28
- 29
- 30
- 31
- 32
- 33
- 34
- 35
- 36
- 37
- 38
- 39
- 40
- 41
- 42
- 43
- 44
- 45
- 46
- 47
- 48
- 49
- 50
- 51
- 52
- 53
- 54
- 55
- 56
- 57
- 58
- 59
- 60
- 61
- 62
- 63
- 64
- 65
- 66
- 67
- 68
- 69
- 70
- 71
- 72
- 73
- 74
- 75
- 76
- 77
- 78
- 79
3.22、准备两张头像,在WXML中根据对应的用户名判断聊天记录是否是自己发出,并赋对应的class样式,后续这个步骤可以直接在接口返回的数据中进行判断,请求查询列表的接口将用户token作为参数传输过去即可。


<view class="cu-chat" id="j_page">
  <view class="cu-item {{item.userId=='2'?'self':''}}" wx:for="{{chatData}}">
    <view class="cu-avatar radius" style="background-image:url(../../../images/cat.jpg)" wx:if="{{item.userId=='1'}}"></view>
    <view class="main">
      <view class="content shadow {{item.userId=='1'?'bg-green':''}}">
        <text>{{item.content}}</text>
      </view>
    </view>
    <view class="cu-avatar radius" style="background-image:url(../../../images/dog.jpg)" wx:if="{{item.userId=='2'}}"></view>
    <view class="date">{{item.createTime}}</view>
  </view>
</view>
- 1
- 2
- 3
- 4
- 5
- 6
- 7
- 8
- 9
- 10
- 11
- 12
- 13
3.23、这里需要注意的是,我们需要在每次发送消息后将页面内容定位在底部,一直保持一个阅读最新消息的状态。
wx.pageScrollTo({
  scrollTop: 9999
})
- 1
- 2
- 3
评论记录:
回复评论: